
How to use Header Builder features of Sky Addons for WordPress
Sky Addons Theme Builder Header feature lets you create fully customized headers for your WordPress website using Elementor’s drag-and-drop interface. Replace your theme’s default header with a custom design that perfectly matches your brand, adds unique functionality, and applies conditionally to specific parts of your site.
The Header Builder gives you complete design freedom beyond your theme’s limitations. Build sticky headers, transparent headers and multi-row layouts with the Elementor widgets you already know. Advanced display conditions let you show different headers based on pages, user roles, or other criteria, enabling truly personalized user experiences.
Key Features
- Full Elementor design capabilities with all widgets and styling options
- Sticky header with the Sky Addons Sticky extension, including Show on Scroll Up
- Transparent header capabilities for hero sections and sliders
- Conditional display based on pages, posts, user roles, and more
- Multiple header templates for different sections of your site
- Dedicated support for Astra, Neve, GeneratePress, OceanWP, Beaver Builder Theme, Genesis, Kadence and Storefront, and a fallback for other classic themes
- Responsive design controls for all device types
Create a Header Template
- In your WordPress Dashboard, go to Sky Addons > Theme Builder
- Click the “Add New” button to create a new template
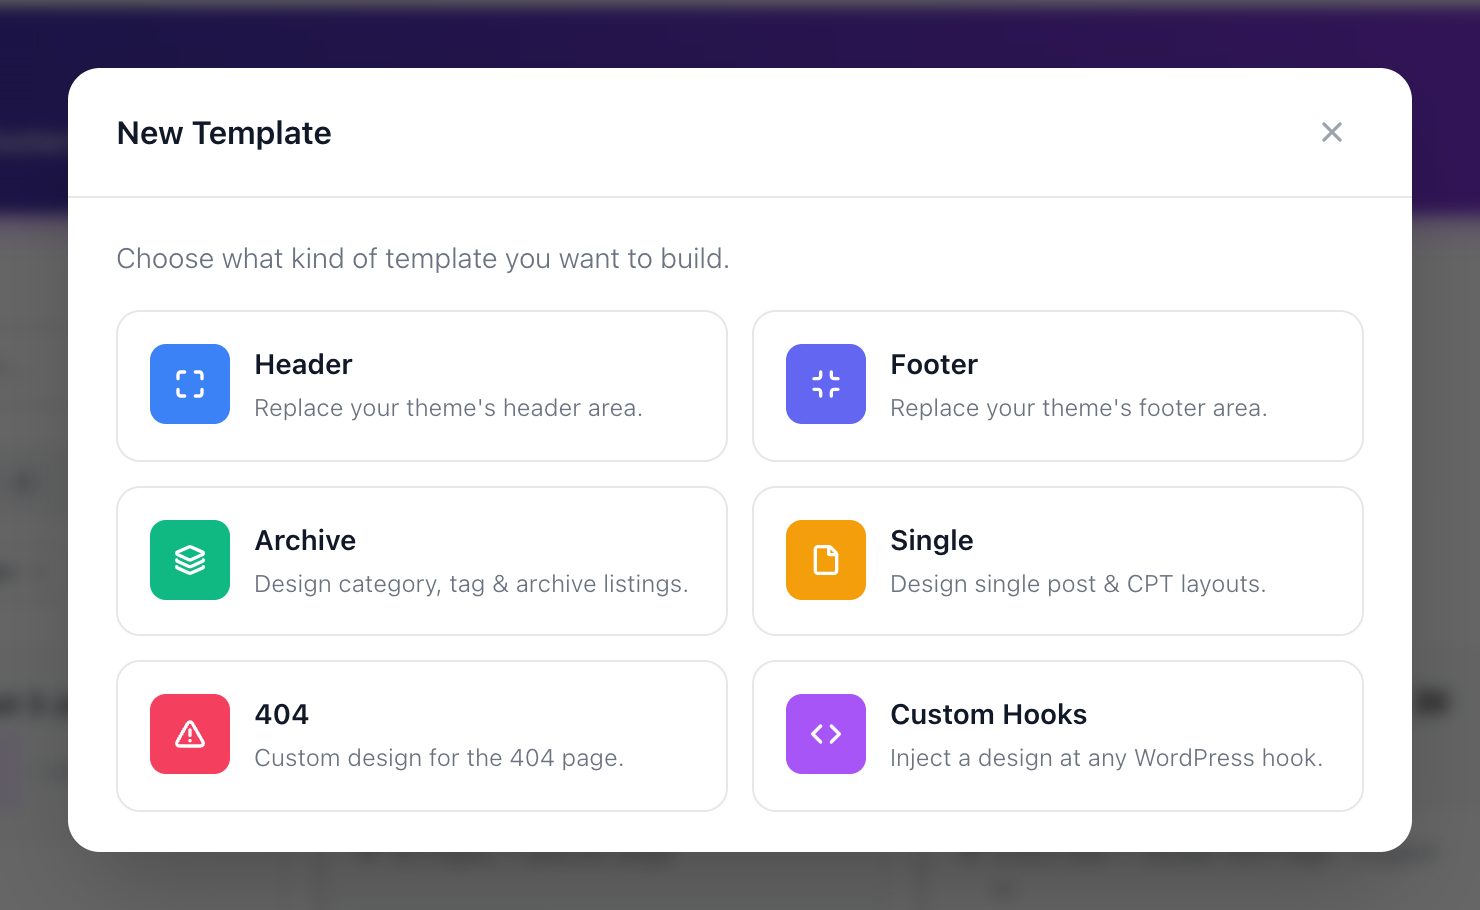
- In the New Template window, click the Header card
- The settings form opens in the same window. Fill it in as shown below, then click Publish. Click Save Draft instead to keep the template off the site while you work on it.
Header Layout Settings
Fill in the settings for your header template:
- Give your header a descriptive name (e.g., “Main Site Header” or “Shop Header”)
- Template type – The type you picked shows in the window title (New Header). To pick another, click the back arrow before you save. You cannot change the type later.
- Status – Set to “Enabled” to activate your header, or “Disabled” to temporarily turn it off. The header shows on the site only when it is published and its Status is Enabled.
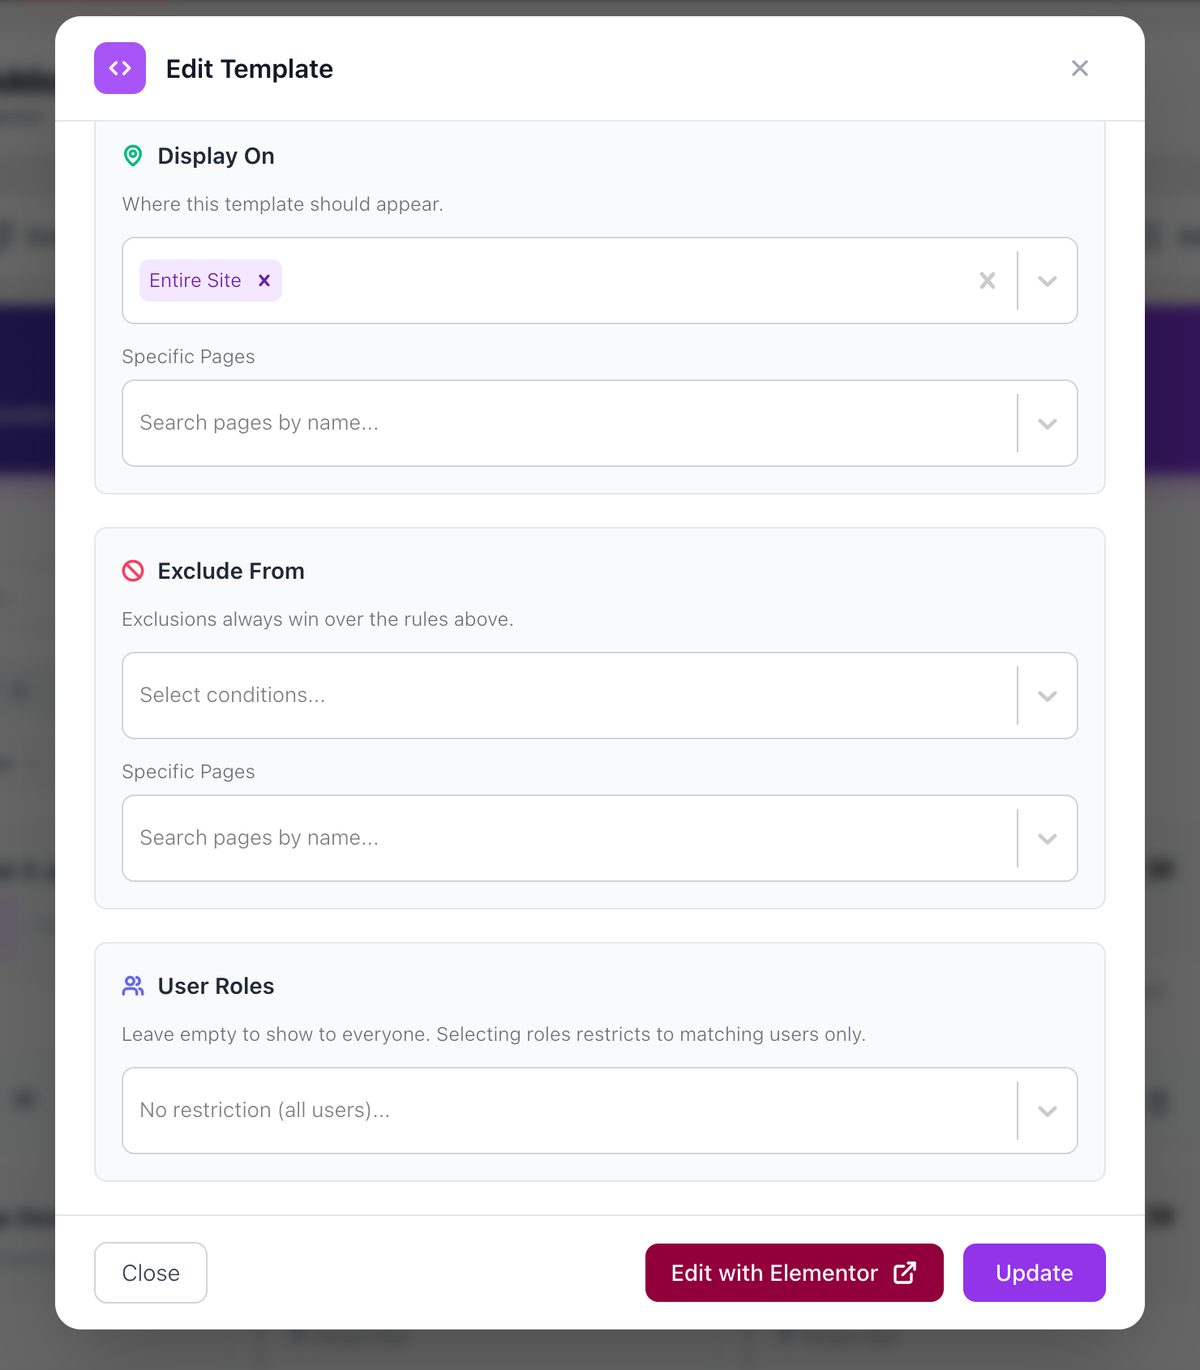
Display On Conditions
Control precisely where your custom templates should appear:
- Entire Site – Apply your template across all pages of your website.
- Perfect for consistent headers/footers that should appear everywhere
- All Pages – Show your template on every standard WordPress page.
- Applies to any content created as a WordPress “Page”
- All Posts – Display your template on all blog posts.
- Applies to single blog posts and to single entries of custom post types
- Special Pages – Target specific WordPress system pages:
- Front Page – Your site’s designated homepage
- Blog Page – Your main blog listing page
- Archive Pages – Category, tag, author, and date archive listings
- Search Page – Search results. Archive Pages does not include them, so tick this one as well if you need it
- 404 Pages – Your site’s “page not found” screen
- Specific Pages – Select specific individual pages:
- Search for pages by title
- Choose exactly which pages should display your template
- Useful for creating unique templates for specific important pages
- User Roles – Control visibility based on visitor status:
- All Users – Display to everyone regardless of login status
- Logged In – Show only to any authenticated WordPress user
- Logged Out – Display only to visitors who aren’t logged in
- Specific Roles – Target administrators, editors, authors, etc.
Exclude From Conditions
The Exclude From panel lists the places where the template must not appear. It always overrides Display On:
- Entire Site – Prevent your template from showing anywhere.
- To turn a template off for a while, use the Status switch instead. It keeps your conditions as they are
- All Pages – Exclude all WordPress pages.
- Create exceptions for blog posts while excluding regular pages
- All Posts – Exclude all blog posts.
- Show your template everywhere except blog posts
- Special Pages – Exclude specific system pages:
- Front Page – Don’t show on homepage
- Blog Page – Don’t show on main blog listing
- Archive Pages – Skip category/tag/author archives
- 404 Pages – Use default theme 404 instead
- Specific Pages – Exclude specific individual pages:
- Select exactly which pages should NOT display your template
- Create exceptions for specific pages that need different designs
The Exclude From conditions always take priority over Display On. If a page matches both, the template is not displayed on that page.
User Role Targeting
Control Header visibility based on user roles:
- All Users – Display the Header to everyone
- Logged In – Show only to any logged-in WordPress user
- Logged Out – Display only to visitors who aren’t logged in
- Administrator/Editor/Author/Contributor/Subscriber – Target specific WordPress user roles
Then click Edit with Elementor – Click to open the Elementor editor and begin designing your header.
Design Your Header with Elementor
- After creating your header template and setting conditions, click “Edit with Elementor”
- Design your header using the full range of Elementor widgets:
- Logo – Add your site logo with custom size and link options
- Navigation Menu – Add your menus with the Nav Menu widget
- Search – Add a search box, for example with the Advanced Search widget
- Buttons – Create call-to-action buttons with custom designs
- Icons – Add social media or functional icons
- Custom HTML/Shortcodes – Integrate advanced functionality
- Use Elementor’s section and column controls to create multi-row headers
- Apply responsive settings to ensure your header looks perfect on all devices
Header Positioning Options
Customize how your header behaves on the page:
- Sticky Header – Select the header container, open the Advanced tab and turn on Enable in the Sticky section added by Sky Addons
- Transparent Header – Create headers that overlay hero sections by setting background to transparent
- Fixed Width/Full Width – Control whether your header spans the full browser width or matches your content width
- Z-Index – Control how your header interacts with other elements when sticky/fixed
Theme Compatibility
Sky Addons Theme Builder has dedicated support for popular WordPress themes:
- Astra – Seamlessly replaces Astra’s header with your custom design
- GeneratePress – Full compatibility with GP’s structure and hooks
- OceanWP – Perfect integration with OceanWP theme framework
- Neve – Compatible with Neve’s header structure
- Genesis – Works with Genesis framework and child themes
- BB Theme – Compatible with Beaver Builder’s theme
- Kadence – Replaces the Kadence header and footer
- Storefront – Replaces the Storefront header and footer
- Default Theme Support – Works with most standard WordPress themes
Save and Preview
- Once you’ve designed your header, click “Publish” or “Update” in Elementor to save your changes
- Click the eye icon on the template card to open the live preview and check the design at desktop, tablet and mobile width
- Visit your website frontend to see your custom header in action
- Test your header on different pages to ensure conditional logic works correctly
- Check responsiveness by viewing your site on different devices or using browser dev tools
Troubleshooting
- Header not appearing: Verify display conditions and check that no exclusion rules are preventing display. Ensure the template is published and its status is set to “Enabled”. Pages set to Elementor’s Canvas template never show Theme Builder templates.
- The wrong header is showing: Only one header template can render on a page. If two templates match the same page, the plugin uses one of them. Give each template conditions that cannot overlap.
- Theme compatibility issues: There is no theme setting to change in Sky Addons. Check whether your theme has its own option to hide its header or footer, then read Theme Compatibility or contact support with your theme name.
- Mobile display problems: Check your responsive settings in Elementor to ensure your header adapts properly to smaller screens.
- Sticky header not working: Check that Enable is on in the Sticky section of the header container’s Advanced tab.
Conclusion
The Sky Addons Theme Builder Header feature gives you unprecedented control over your site’s header design without touching code. Create unique, functional headers that perfectly complement your content and provide intuitive navigation for your visitors. Whether you need a simple branded header or complex conditional headers for different sections of your site, the Header Builder makes it possible through a familiar Elementor interface.
If you have any questions or encounter any challenges while using, please don’t hesitate to reach out to our dedicated support team at https://wowdevs.com/support/ where our expert team is ready to provide prompt and helpful assistance.